
So, what does it actually mean to "deploy" a smart contract? In simple terms, you're taking your compiled code and broadcasting it to a decentralized network like Ethereum. Once there, it becomes a permanent, public program that can run on its own. This is the moment your Solidity code transforms into live, on-chain logic, bringing your decentralized application to life.
From Code to Chain: How Smart Contract Deployment Works
Before you even think about typing a deployment command, it's vital to grasp what's happening under the hood. This isn't like uploading a file to a server. You're executing a permanent transaction that sends your application's core logic to thousands of computers across the globe.
Think of it less like an upload and more like publishing an app to an unchangeable public record. Getting this right from the start is the difference between blindly following a tutorial and truly understanding how to launch secure and efficient dApps.
Core Deployment Concepts
When you get down to it, there are two key pieces of the puzzle you'll be handling: the bytecode and the Application Binary Interface (ABI).
- Bytecode: This is the low-level, machine-readable version of your smart contract, generated when you compile your Solidity code. This is the actual program that gets stored on the blockchain.
- ABI: This is a JSON file that essentially serves as a user manual or translator for your contract. It outlines how to interact with your contract's functions, telling other applications and contracts exactly how to call them. If you're new to these terms, our Web3 dictionary can help you get up to speed.
This diagram offers a great high-level view of the journey from your local machine to the live blockchain network.
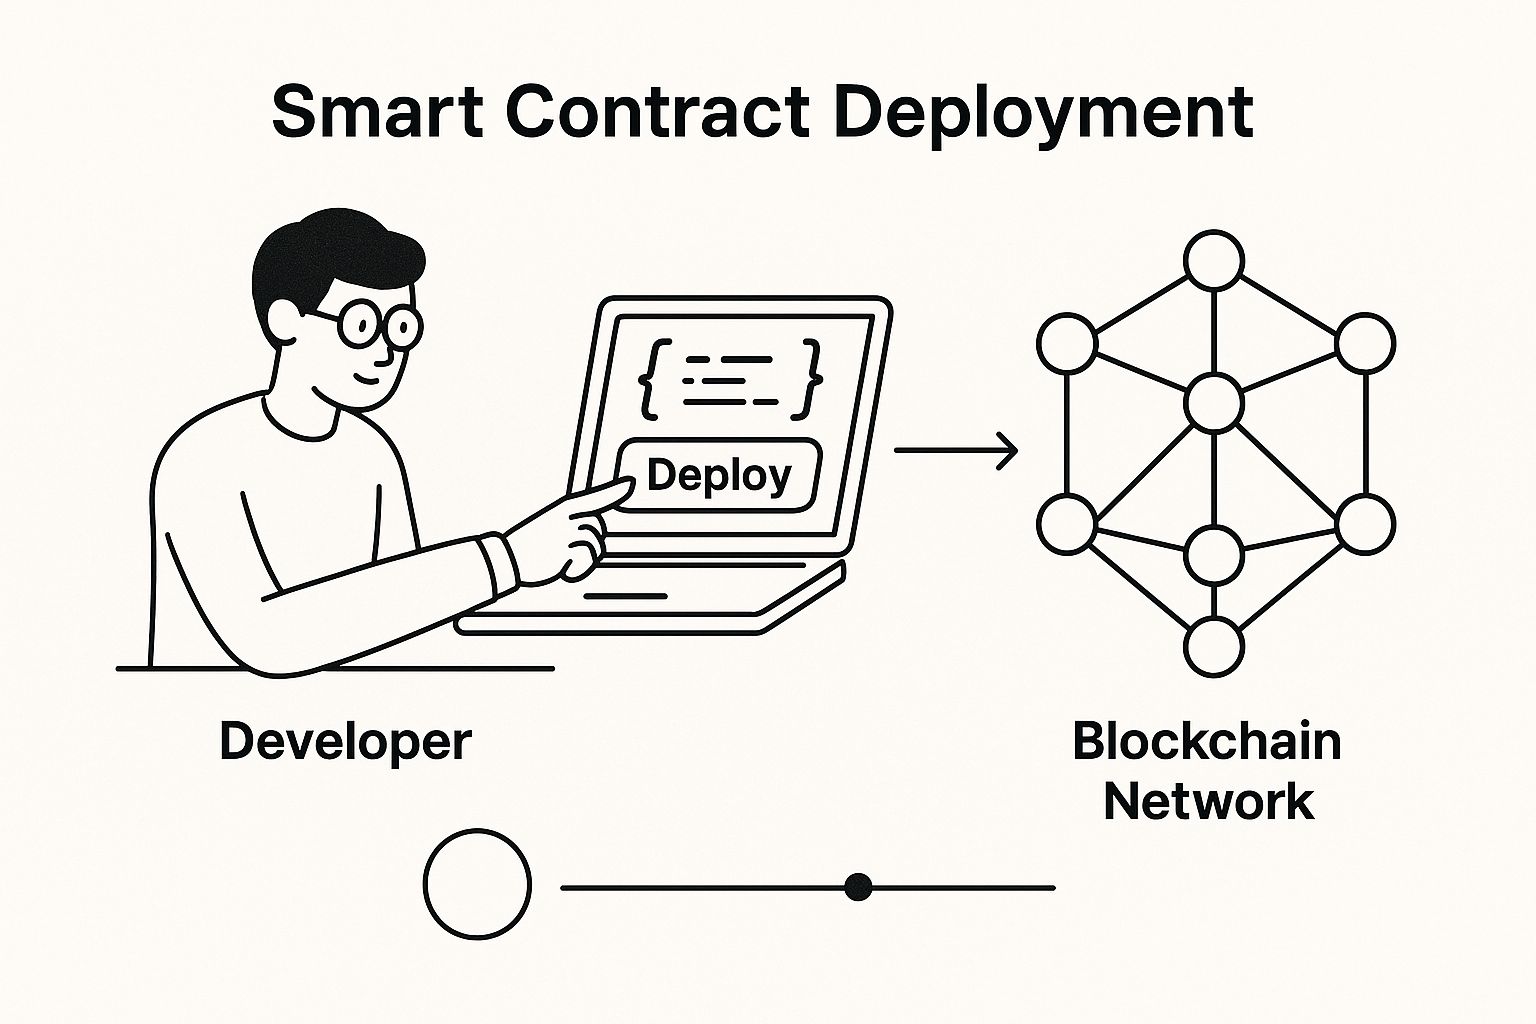
As you can see, your local code is packaged and sent out, where it gets validated and stored by nodes all over the world.
The Role of Gas and Networks
To get your contract onto the network, you have to pay for the transaction. This payment, known as a "gas fee," is made in the network's native currency (like ETH for Ethereum). It’s what you pay the validators for the computing power they use to process your deployment and add it to the blockchain.
This brings us to a crucial decision: which network to deploy on? Jumping straight to the Mainnet involves real money and is irreversible. I can't stress this enough—always start with a testnet. Networks like Sepolia let you use valueless test funds, so you can test, debug, and perfect your contract without any financial risk.
Here's a quick comparison to help you decide which network is appropriate for your deployment needs.
Mainnet vs Testnet Deployment Comparison
| Feature | Testnet (e.g., Sepolia) | Mainnet (Ethereum) |
|---|---|---|
| Cost | Free (uses valueless test ETH) | Real ETH required for gas fees |
| Risk | Zero financial risk | High financial risk; mistakes are permanent and costly |
| Purpose | Development, testing, and debugging | Live, production-ready applications |
| Data | Not permanent; can be reset | Permanent and immutable |
| Security | Lower security, not for real assets | Highest level of security |
Ultimately, a testnet is your sandbox for experimentation, while the Mainnet is the stage for your final, polished application.
The potential here is enormous. The global smart contracts market is expected to grow from USD 3.69 billion in 2025 to a staggering USD 815.86 billion by 2034. This explosion shows just how powerful this technology is for automating secure agreements across nearly every industry imaginable.
Getting Your Deployment Environment Ready
Before we can push a smart contract to the blockchain, we need to get your local machine set up with the right gear. Think of it like a pre-flight check—getting your environment configured properly from the start is the key to a smooth launch and helps you sidestep a ton of frustrating errors later on.
First things first, we need to lay the groundwork for just about every modern blockchain development tool out there: Node.js and its sidekick, npm (Node Package Manager). Node.js is what lets us run JavaScript code on our computer, outside of a browser, which is exactly how powerful frameworks like Hardhat and Truffle work. Head over to the official Node.js website and grab the latest stable version.
Once that's installed, pop open your terminal or command prompt. A quick node -v and npm -v should spit back version numbers for both. If you see them, you're golden.
Getting Your Wallet in Order
With the basic dev tools in place, it's time to set up your crypto wallet. This is your digital passport for interacting with the blockchain. For developers, the go-to choice is almost always MetaMask. It's more than just a place to hold funds; it’s the bridge you'll use to sign transactions and deploy your code.
As you create a new wallet, MetaMask will show you a 12-word secret recovery phrase. Pay close attention here, because this is the master key to your entire wallet.
Critical Security Tip: I can't stress this enough: never store your secret recovery phrase digitally. Don't email it to yourself, don't save it in a notes app, and definitely don't share it. Write it down on a piece of paper and hide it somewhere safe. If someone gets their hands on that phrase, they get your wallet.
Out of the box, MetaMask connects to the Ethereum Mainnet. We don't want to play with real money just yet, so we'll switch to a test network. Just click the network dropdown at the top of the MetaMask window and select a testnet. For this guide, we're sticking with the Sepolia testnet, which is currently the main supported playground for Ethereum developers.
Topping Up with Testnet ETH
Even on a testnet, every transaction—including deploying a contract—costs gas. This means we need some testnet ETH, which is essentially play money with no real-world value. The way we get this is from a service called a faucet.
You can grab some Sepolia ETH from a few reliable spots. Just copy your wallet address from MetaMask, paste it into the faucet, and you're good to go.
- Sepolia Faucet by Alchemy: A very popular choice. You'll need to sign up for a free Alchemy account, but it's well worth it.
- QuickNode Sepolia Faucet: Another solid option that gets you testnet funds pretty fast.
After you request the funds, you should see the test ETH land in your wallet within a few minutes. This is your ticket to practice the entire deployment process from start to finish without putting any actual assets on the line—a non-negotiable step for any developer.
Getting Started with a Hardhat Project
With your local environment set up, it's time to roll up our sleeves and get into the real work with Hardhat. There's a reason so many seasoned developers rely on this environment—it streamlines everything from compiling and testing to deploying and debugging. It just makes your life easier.
First things first, let's get a project scaffolded. Create a new folder for your project, open it in your terminal, and simply run npx hardhat.
This command fires up an interactive wizard that builds out a standard project structure for you. You'll immediately see new folders like contracts/, scripts/, and test/ pop into existence. This isn't just for show; it’s a battle-tested layout that keeps your work organized from the get-go.

This standardized workflow is one of the best things about using a professional tool like Hardhat. It helps you avoid a messy project structure, which can become a real headache down the road.
Writing and Compiling Your First Contract
Now for the fun part: writing some Solidity code. Once your project is initialized, head over to the contracts/ directory. Hardhat includes an example file here, which you can either delete or use as a starting point. For our purposes, we'll create a new contract from scratch called Greeter.sol.
This contract is a classic "hello world" for the blockchain space. Its job is simple: store a greeting message and let us change it later. It's the perfect way to get a feel for the basic mechanics without getting bogged down in complexity.
After you've written and saved your Greeter.sol file inside the contracts/ folder, the next move is to compile it.
Compiling is a crucial step. It takes the Solidity code you wrote and converts it into bytecode—the language the Ethereum Virtual Machine (EVM) understands. It also spits out the ABI (Application Binary Interface), a JSON file that acts like a manual, telling other applications how to call your contract's functions. You can't deploy anything without these two pieces.
Back in your terminal, run the command npx hardhat compile. Hardhat is smart enough to find all the .sol files in your contracts/ directory, compile them, and flag any syntax errors.
If it all goes smoothly, a new artifacts/ directory will appear. This is where Hardhat stores your compiled bytecode and ABI, ready for deployment. The development of powerful tools like Hardhat is a direct result of the industry's explosive growth. You can see just how fast things are moving in these DeFi statistics.
While the overall smart contract market is massive, the specific platform market is also on a solid growth trajectory. Valued at USD 326.4 million in 2025, it's expected to see consistent growth through 2033 as major players continue to innovate. You can dive deeper into the numbers with this smart contract platform market report.
With our contract successfully compiled, we're one big step closer to getting it on-chain.
Writing an Automated Deployment Script
You could try to deploy your smart contract manually, but frankly, it’s a recipe for disaster. It's tedious, error-prone, and just not scalable. A solid deployment script is your best friend here—it creates a repeatable, reliable process you can count on every single time.
This is how you guarantee consistency, whether you're pushing to a testnet for the tenth time or gearing up for that one-shot mainnet launch. Let's get our hands dirty and build a deployment script inside our Hardhat project. We’ll be using the ethers.js library, which Hardhat conveniently bundles for us, to interact with the Ethereum network.
The Anatomy of a Deployment Script
First things first, find the scripts/ directory that Hardhat generated when you initialized your project. Go ahead and create a new file in there called deploy.js. This is where all the magic will happen.
The goal is to write a simple Node.js script that tells Hardhat two things: which contract to deploy and which wallet account to use for signing the transaction and paying the gas fees.
A good deployment script always follows a logical flow:
- Grab the signer: This is the account that will pay for the deployment.
- Find the contract: We need to point
ethers.jsto the compiled contract artifact. - Kick off the deployment: This sends the transaction with the contract’s bytecode to the network.
- Wait for confirmation: The script needs to pause until the network has officially mined the transaction.
- Log the new address: Finally, we’ll print the contract's on-chain address so we know where to find it.
Automating this flow is a huge win. It virtually eliminates the chance of fumbling a crucial step, which is absolutely vital when you’re working with irreversible blockchain transactions.
Putting the Code Together
Alright, let's look at the actual code. We'll start by importing the necessary Hardhat components and then define our main function.
// scripts/deploy.js
const hre = require("hardhat");
async function main() {
const greeter = await hre.ethers.deployContract("Greeter", ["Hello, Find Web3!"]);
await greeter.waitForDeployment();
console.log(
Greeter with initial message deployed to ${greeter.target}
);
}
main().catch((error) => {
console.error(error);
process.exitCode = 1;
});
So what's going on here? The line hre.ethers.deployContract("Greeter", ["Hello, Find Web3!"]) is doing all the heavy lifting. It finds our compiled Greeter contract and passes the string "Hello, Find Web3!" into its constructor as an initial argument.
My advice? Never, ever hardcode your private keys or API keys in a script. The professional standard is to use a
.envfile to store sensitive info like your MetaMask private key or an Alchemy RPC URL. Hardhat works seamlessly with thedotenvpackage, making this approach both secure and easy to implement.
The next line, await greeter.waitForDeployment(), is just as critical. It forces our script to wait patiently until the transaction is confirmed on the blockchain before moving on. Without it, the script might finish before the deployment is even complete.
Finally, that simple console.log() provides instant gratification. It prints our new contract's permanent on-chain address right into the terminal, ready for us to use.
For teams managing more complex projects, taking this automation a step further is a game-changer. If you want to really cut down on manual work, mastering CI/CD automation for simplified deployment can integrate your scripts into a full-blown professional workflow.
Alright, this is where the magic happens. After all the setup and scripting, it’s time to push your smart contract onto the blockchain. We’ll be using the Sepolia testnet for this, which is the perfect sandbox environment to launch and test without spending real money.
Running the deployment script with Hardhat couldn't be simpler. You just need to pop open your terminal and run a single command. This command tells Hardhat which script to execute and which network to use.
npx hardhat run scripts/deploy.js --network sepolia
Once you hit Enter, you'll see Hardhat spring into action. It will connect to the network, send out your transaction, and wait for it to be mined. When it's all done, you'll see the contract address printed directly in your terminal. That’s it—your code is officially live on the blockchain!
Taking It From Deployed To Verified
Getting your contract deployed is a massive win, but don't pop the champagne just yet. For anyone to trust and interact with your contract, you need to verify its source code on a block explorer like Etherscan. This is how you prove to the world that the code running on-chain is the exact same code you wrote.
First, grab that contract address from your terminal output and head over to the Sepolia Etherscan site. Paste the address into the search bar. You'll find your contract's page, but it will have a little warning that the code isn't verified yet. Just click the "Contract" tab and look for the "Verify and Publish" link to get started.
This is the Etherscan page where you'll kick off the verification process.

On the next screen, you’ll need to select the exact compiler version and license you specified back in your hardhat.config.js file.
My Pro Tip: I've seen countless verification attempts fail for the silliest reasons. The most common culprit is a mismatch in the compiler settings or constructor arguments. Before you hit submit, triple-check that the Solidity version, optimizer settings, and any arguments you passed during deployment are identical to what you're entering on Etherscan. Even a single character difference will throw an error.
After that, you'll be prompted to paste your entire flattened Solidity source code into a text box. Etherscan then compiles your code on its end and compares the resulting bytecode with what's actually on the blockchain. If they match, you get that beautiful green checkmark.
Why Transparency Is Everything
In Web3, this verification step isn't just a nice-to-have; it's a fundamental requirement for any serious project. It’s all about building on the transparent, trust-based ethos of the space.
This is especially true in finance, where smart contracts are rapidly becoming standard. With forecasts suggesting that 85% of global financial institutions will be using smart contracts by 2025 and 56% of contracts living on public chains, that green checkmark is your ticket to building user confidence.
While deploying, always keep an eye on real-time ETH gas prices. This helps you manage your transaction costs effectively, not just for the initial deployment but for every interaction users will have with your contract down the line.
Mastering the deploy-and-verify workflow is a core competency for any developer in this field. Once you're comfortable with this process, you're well on your way to building a career. If you're ready to take that next step, you can find tons of opportunities on platforms that list jobs in the blockchain industry.
Got Questions About Deploying? Let's Talk.
Even with the perfect script, deploying a smart contract for the first time can bring up a lot of questions. It's a normal part of the process. I've been there, and I’ve helped countless developers through it. Let's walk through some of the most common things that come up.
"How Much is This Going to Cost Me?"
The first question is almost always about money. Gas fees are the wild card in any deployment, and their costs can swing dramatically. A deployment that costs $20 one day could easily jump to $100 the next, all depending on how busy the network is.
You can't control the market, but you can be strategic. I always tell my team to aim for deployment during off-peak hours. Think weekends or late nights in US and European time zones. A little bit of timing can save you a surprising amount on gas.
"What If I Find a Bug After Deployment?"
This one's a classic, and the answer gets to the very heart of blockchain technology. Once your contract is live, it’s immutable. You can't just edit the code like you would with a web server. That’s a feature, not a bug, but it requires a different way of thinking.
So, what do the pros do? We use a proxy pattern. Instead of users interacting directly with your main contract, they talk to a simple proxy contract. This proxy just forwards all the calls to your real logic contract. When you need to fix a bug or add a feature, you deploy the new logic and just tell the proxy to point to the new address. It's a clean way to get upgradeability while keeping a consistent, stable address for your DApp.
Honestly, if you're building anything meant for long-term use, this isn't optional. It's the industry standard.
"Help! My Deployment Failed. Now What?"
It happens. When a deployment transaction fails, it’s almost always for one of two reasons: not enough gas, or a problem with the node you're using.
- Insufficient Gas: This is a painful one. If you set your gas limit too low, the transaction will fail, but the network still keeps the gas you spent. Ouch. Always, always check a reliable gas tracker right before you hit "deploy" on mainnet.
- Node Error: Sometimes the free, public RPC endpoint you're connected to is just overloaded or flaky. It might drop your transaction. This is why serious projects rely on dedicated node providers like Alchemy or Infura—their infrastructure is built to be fast and reliable.
"Can I Deploy the Same Contract on Ethereum and Polygon?"
Absolutely, and you probably should! This is a great way to expand your project's reach. Since networks like Polygon, Avalanche, and BSC are all EVM-compatible, your Solidity code will work just fine.
You won't even need to change your deployment script much. The main tweak is in your Hardhat config file—you’ll just add the RPC endpoint and chain ID for each network you want to support. A multi-chain strategy is a powerful move in today's ecosystem.
Ready to find your place in the fast-growing world of blockchain development? Find Web3 is the premier job board for roles in crypto, DeFi, and the metaverse. We connect top talent with leading companies, offering everything from engineering positions to marketing roles. Start your search and build your Web3 career today at https://findweb3.com.