
So, you're ready to dive into the world of smart contracts. Excellent. Learning Solidity is the single most important step you can take on your journey into blockchain development. This isn't just about learning another programming language; it's about getting the keys to build decentralized applications (dApps) on Ethereum and countless other blockchains. From complex financial tools to the next big digital collectible, it all starts here.
Your First Steps in Blockchain Development
Before we jump into writing code, let’s get our bearings. It's really important to understand what Solidity is and why it's such a big deal in the blockchain space.
Think of Solidity as the language you use to create self-executing contracts. These "smart contracts" aren't dusty legal documents; they're programs that live on a blockchain and automatically run when certain conditions are met. They're the fundamental building blocks for pretty much everything you've heard about in Web3.
I've designed this tutorial to be a practical, hands-on resource. For some great general advice on creating effective how-to guides, you might find these insights useful. My goal here is to give you clear, actionable steps that will help you build a solid foundation as a developer.
Why Solidity Runs the Web3 World
Solidity's influence boils down to its deep integration with the Ethereum Virtual Machine (EVM), which is the engine that runs smart contracts on Ethereum. Since Ethereum was the first major platform to introduce this capability, Solidity naturally became the go-to language for anyone building in the space. That early start created a massive network effect that's still felt today.
That momentum has made Solidity the most popular language for smart contract development by a long shot. As of 2025, it's used in roughly 65% of all smart contracts out there. If you want to dig deeper, this breakdown of top smart contract programming languages offers more context. For you, this dominance is a huge advantage—it means a massive community, tons of documentation, and the best development tools are all at your fingertips.
"Learning Solidity isn't just about learning a programming language; it's about learning the logic of decentralization. It forces you to think about trust, security, and automation in entirely new ways."
When you write Solidity, you're not just coding for a single server. You're deploying code to a global, decentralized computer, and that changes everything about how you build applications.
The Engine Behind dApps, DeFi, and NFTs
So, what can you actually do with this knowledge? Solidity is the powerhouse behind some of the most exciting corners of technology right now. Understanding its role will give you the motivation to push through the learning curve. If you come across any terms that seem confusing, our comprehensive Web3 dictionary is a great resource to keep handy.
Here’s a quick look at what Solidity makes possible:
- Decentralized Finance (DeFi): Think lending, borrowing, and trading assets without a bank in the middle. Big names like Aave and Uniswap are powered by Solidity smart contracts.
- Non-Fungible Tokens (NFTs): All those unique digital assets representing art, collectibles, and more? They're created and exchanged using Solidity contracts, most commonly based on the ERC-721 token standard.
- Decentralized Autonomous Organizations (DAOs): These are organizations run by a community, with rules baked directly into code. Solidity is used to write the governance contracts that let members vote and control shared funds.
By learning Solidity, you're gaining the skills to build and innovate in these rapidly growing fields. You're not just writing lines of code—you're helping build the very infrastructure of a more transparent, user-owned internet. This is where it all begins.
Setting Up A Professional Solidity Environment
Writing Solidity code is one thing; building production-ready smart contracts is another beast entirely. While browser-based IDEs like Remix are fantastic for quick experiments, any serious development happens on your local machine. This setup gives you far more control, better performance, and access to a suite of powerful tools that simply aren't available online.
Our goal here is to replicate the kind of development environment used by top-tier blockchain teams. We're moving past simple text editors and embracing a structured framework that automates the tedious parts of compiling, testing, and deploying your code.
The Foundational Tools
Before we dive into the main framework, there are two prerequisites you'll need. If you've done any kind of modern web development before, you likely already have these installed.
- Node.js: This is the JavaScript runtime that powers most of the Web3 development ecosystem. The tools we rely on are built on top of it, so it's a non-negotiable part of the stack.
- Visual Studio Code (VS Code): You can technically write Solidity in any text editor, but VS Code has become the undisputed king for blockchain development, thanks to its massive library of helpful extensions.
Once you have VS Code ready, do yourself a favor and install the official solidity extension by Juan Blanco. It adds syntax highlighting, code completion, and error checking that will make your life infinitely easier.
Why We Start With Hardhat
With the basics out of the way, let's talk about the core of our setup: Hardhat. Think of Hardhat as a complete workshop for Ethereum development, designed to streamline the entire smart contract lifecycle. It’s the industry standard for a reason.
In fact, recent surveys show over 71% of Ethereum engineers use Hardhat as their main framework. Its popularity isn't just hype; it's built on a fantastic developer experience, a super-fast local test node, and a rich plugin ecosystem. Even massive projects like Uniswap build with it because it’s fast, reliable, and provides excellent error tracking.
At its core, Hardhat gives you a local Ethereum network that runs entirely on your computer. It allows you to deploy contracts, run thousands of tests, and debug your code without spending real money on gas or waiting for a slow public testnet.
To get a better sense of where Hardhat fits in, it helps to know the other major players.
Solidity Development Tool Comparison
Here’s a quick look at the most common tools and their primary use cases to help you understand why we're starting with Hardhat.
| Tool | Primary Use Case | Key Feature |
|---|---|---|
| Remix | Quick prototyping and learning | Browser-based, zero setup required. |
| Hardhat | Professional smart contract development | Powerful local testing, extensive plugin ecosystem. |
| Truffle | Legacy projects and full-stack dApps | Mature, includes a suite of tools for front-end integration. |
| Foundry | Performance-intensive testing | Written in Rust for extremely fast test execution. |
While tools like Foundry are gaining traction for their speed, Hardhat's JavaScript/TypeScript environment offers a more familiar and flexible starting point for most developers.
Initializing Your First Hardhat Project
Getting a new project up and running is incredibly simple.
First, create a new folder for your project. Open that folder in your terminal and run npm init -y, which quickly generates a package.json file to manage your project's dependencies.
Next, you'll install Hardhat as a development dependency. Run this command right in the same terminal window:npm install --save-dev hardhat
Once that finishes, you can kick off the Hardhat setup wizard by running:npx hardhat
The command-line interface will ask you a few questions. For our purposes, just select the "Create a JavaScript project" option. This will automatically create a clean project structure for you, complete with folders for your contracts, tests, and deployment scripts.
And just like that, you have a professional-grade local environment, ready for you to start building. You can find more practical guides like this one in our other Web3 posts.
Writing Your First Smart Contract From Scratch
Alright, you've got your development environment fired up and ready to go. Now for the fun part: turning those abstract blockchain concepts into actual, working code. We're going to build a classic starter contract called SimpleStorage.
Don't let the name fool you. While it only does two simple things—store a number and let us retrieve it—this is the "Hello, World!" of the smart contract world. Getting your hands dirty with this contract is the best way to really grasp the fundamental syntax and structure of Solidity. It’s a crucial first step.
Laying the Groundwork of Your Contract
Every Solidity file kicks off with a couple of important lines. The first is a license identifier, which is a best practice for open-source code.
The second, and most critical, is the version pragma. This tells the compiler which version of Solidity you wrote the code for. It’s a safeguard that prevents your contract from accidentally being compiled with a future, incompatible version that could introduce bugs or unexpected behavior.
// SPDX-License-Identifier: MIT
pragma solidity ^0.8.0;
Here, pragma solidity ^0.8.0; means our code will work with any compiler version from 0.8.0 all the way up to, but not including, 0.9.0. That little caret (^) gives us a safe, flexible range.
With that out of the way, we can declare the contract itself using the contract keyword. Think of a contract as a container for your code, much like a class in other programming languages. All our logic, variables, and functions will live inside the SimpleStorage block.
contract SimpleStorage {
// Our code will go in here
}
Defining State Variables
This is where the magic of the blockchain comes in. State variables are values that get permanently written to the contract's storage on the blockchain. Any time you change one of these variables, it creates a new transaction and forever alters the blockchain's state. This is what makes a smart contract "stateful."
For our contract, we'll define a single state variable to hold our number.
contract SimpleStorage {
uint256 public storedNumber;
}
Let's quickly break down that single line:
uint256: This is our data type—an unsigned integer of 256 bits. It’s the go-to type for most numerical values in Ethereum, from token balances to simple counters.public: This is a visibility keyword. By markingstoredNumberaspublic, the Solidity compiler does something really helpful: it automatically creates a "getter" function for us. This means anyone can read the value ofstoredNumberwithout us having to write any extra code.storedNumber: This is just the name we’ve chosen for our variable.
The infographic below shows how straightforward it is to declare different data types, like uint and string, inside a Solidity contract.
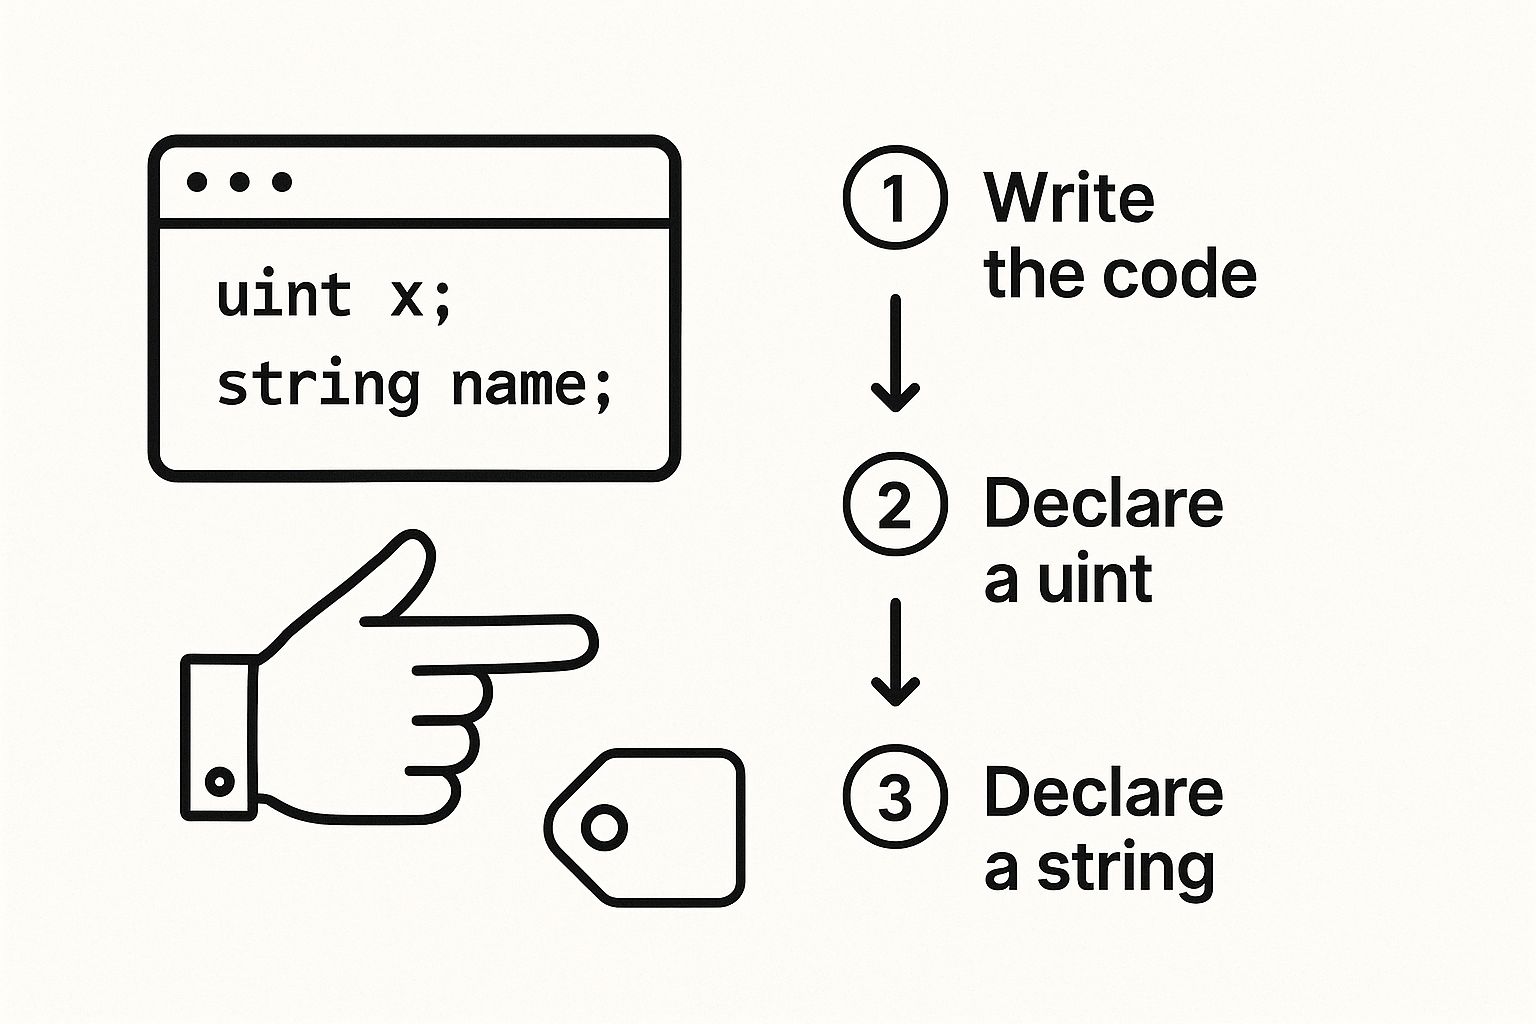
It’s a great visual reminder of how we define the contract's permanent memory on the blockchain.
Creating Functions to Interact with State
So, we have a variable to store data. Now we need a way to actually interact with it. We'll build two functions: one to change the number and another to read it.
Writing Data to the Blockchain
First up, a function to update our storedNumber. This function will take a number as an input and set our state variable to that new value.
function set(uint256 _newNumber) public {
storedNumber = _newNumber;
}
This set function is a state-changing function. When you call it, you're creating a transaction that modifies data on the blockchain. You might notice I've named the parameter _newNumber—prefixing function parameters with an underscore is a common convention in the community to easily distinguish them from state variables.
Key Takeaway: Because the
setfunction writes new data, calling it requires a transaction and costs gas. Gas is the fee you pay to execute operations on the Ethereum network. Any function that changes the state of the blockchain will always have a gas cost.
Reading Data from the Blockchain
While making our state variable public already gave us a free getter function, it's good practice to know how to write a dedicated one yourself. This function will simply return the current value of storedNumber.
function get() public view returns (uint256) {
return storedNumber;
}
There are two important keywords here: view and returns (uint256).
view: This tells the compiler that the function is "read-only." It only looks at the blockchain's state; it doesn't modify anything. Because they don't create a transaction, functions marked asviewdon't cost any gas to call.returns (uint256): This explicitly declares the data type the function will send back. In our case, it’s returning auint256.
The Complete SimpleStorage Contract
Putting it all together, your first complete smart contract is clean, simple, and has all the core components you'll see in more complex contracts.
// SPDX-License-Identifier: MIT
pragma solidity ^0.8.0;
/**
@title SimpleStorage
@dev A basic contract to store and retrieve a number.
*/
contract SimpleStorage {
// A state variable to store a number
uint256 public storedNumber;/**
- @dev Sets the stored number to a new value.
- @param _newNumber The new number to store.
*/
function set(uint256 _newNumber) public {
storedNumber = _newNumber;
}
/**
- @dev Retrieves the currently stored number.
- @return The uint256 value of storedNumber.
*/
function get() public view returns (uint256) {
return storedNumber;
}
}
I've also gone ahead and added NatSpec comments (@title, @dev, etc.). This is the standard way to document Solidity code, and it's incredibly useful. It makes your code easier for other developers—and tools like Etherscan—to understand at a glance.
And there you have it. A fully-functional smart contract, ready for compiling and testing.
Getting Your Smart Contract Ready: Compiling and Testing
Alright, you've written your first smart contract. That's a huge step. But in the world of blockchain, where transactions are final and code can't be easily changed, just writing the code is barely half the job. Now for the most important part: making absolutely sure it works exactly as you expect.
This is where compiling and testing come in. These aren't just boxes to check; they are your safety net.
Compiling is how you translate your human-friendly Solidity code (the .sol file) into bytecode. Think of bytecode as the machine language that the Ethereum Virtual Machine (EVM) actually understands and runs. Testing is how you prove to yourself—and your future users—that this bytecode won't have any nasty surprises.
Compiling Your Contract with Hardhat
One of the best things about using a framework like Hardhat is that it makes complex tasks feel simple. Compiling is a perfect example.
Just pop open your terminal in the root of your project and run this one command:
npx hardhat compile
That's literally it. Hardhat finds your SimpleStorage.sol file inside the /contracts directory, checks the Solidity version in your hardhat.config.js file, and does all the heavy lifting for you.
Once it's done, you’ll see two new folders appear: /artifacts and /cache.
- Artifacts: This is the important one. It holds the compiled output, including a JSON file for your contract. Inside that file, you'll find the bytecode and, crucially, the Application Binary Interface (ABI). The ABI is like a user manual for your contract, telling other applications (like a website's front-end) how to call its functions.
- Cache: Hardhat uses this folder to speed things up. It remembers what it has already compiled so it doesn't have to redo work unnecessarily on the next run.
With that, your Solidity code is now in a format the blockchain can execute. Time to make sure it executes correctly.
Writing Your First Automated Test
You can poke around and test things manually in tools like Remix, and that's fine for a quick sanity check. But for any serious project, you need automated tests. They’re repeatable, reliable, and will save you from introducing new bugs down the road.
Hardhat comes ready to go with modern testing tools like Mocha (the test runner) and Chai (the assertion library).
Head over to the /test directory in your project. You can get rid of the sample test file that's there. Let's create our own: SimpleStorage.test.js.
Our test will follow a simple, classic pattern:
- Deploy a completely fresh version of our
SimpleStoragecontract. - Call the
setfunction to store a number. - Call the
getfunction and check if we got the same number back.
This basic "arrange, act, assert" flow is the foundation of almost all smart contract testing. It's not just about compiling code; adopting solid software testing best practices is what separates hobby projects from secure, production-ready applications.
Crafting a Test Script from Scratch
Let's build that SimpleStorage.test.js file. We'll start with the necessary imports.
const { expect } = require("chai");
const { ethers } = require("hardhat");
describe("SimpleStorage", function () {
let simpleStorage;
// This block runs before each test, deploying a new contract instance
beforeEach(async function () {
const SimpleStorage = await ethers.getContractFactory("SimpleStorage");
simpleStorage = await SimpleStorage.deploy();
await simpleStorage.deployed();
});
// Our first actual test case
it("Should store a new value when set is called", async function () {
const testValue = 42;
// Call the 'set' function, which creates a transaction
const tx = await simpleStorage.set(testValue);
await tx.wait(); // We need to wait for the transaction to be mined
// Check if the number stored in the contract is now our test value
expect(await simpleStorage.get()).to.equal(testValue);
});
});
See that describe block? It’s just a way to group all the tests related to SimpleStorage. The real magic is the beforeEach hook. It runs before every single test (it block), deploying a clean contract each time. This is critical for preventing the results of one test from messing up another.
Pro Tip: Always isolate your tests with a
beforeEachhook. It guarantees that every test starts from the exact same clean slate, which helps you avoid flaky tests that fail for unpredictable reasons.
Now, to run it, go back to your terminal and type:
npx hardhat test
Hardhat will spin up a temporary, local blockchain just for your test, compile your code if needed, deploy your contract, run the script, and then shut everything down. You should get a nice green checkmark in your console, confirming your contract’s logic is solid. This instant feedback is precisely why we use tools like Hardhat.
Deploying Your Contract to a Live Testnet
Up to this point, all our work has been confined to our local machine. Now for the exciting part: we're going to push our SimpleStorage contract onto a public blockchain where anyone in the world can find and interact with it.
We'll be using a testnet for this, specifically the Sepolia testnet. Think of it as a live, functioning clone of the Ethereum network, but the "Ether" used on it has no real-world value. This is the perfect proving ground—it lets us deploy and test our code in a real blockchain environment without risking a single cent.
Getting Test Ether From a Faucet
To get anything done on a blockchain, you need to pay for the transaction's "gas" fees. On a testnet, this is done with test ETH, which you can get for free from a service called a "faucet."
The easiest way to get your hands on some Sepolia ETH is by using a public faucet. A popular and reliable one is run by Alchemy. You'll just need to sign up for a free account and paste your wallet address into the faucet. In a few minutes, you should see the test ETH land in your wallet.
Don't skip this. Without these funds, your deployment transaction will simply fail.
Securely Configuring Your Project
For your Hardhat project to talk to the testnet, it needs two key pieces of information: the network's connection details and the wallet account it should use to sign the deployment transaction. This means we have to handle your wallet's private key, and we need to do it with extreme care.
Critical Security Warning: Never, ever, commit your private key to a public repository like GitHub. If you expose a private key, even for a test wallet, you should consider that account and all its funds compromised.
To keep your credentials safe, we'll use a .env file, which is standard practice for storing sensitive data locally. First, you'll need to install the dotenv package in your project:
npm install dotenv
Next, create a new file right in your project's root folder and name it .env (don't forget the leading dot). Inside this file, you'll add two lines: one for your private key and one for an API URL from a node provider.
SEPOLIA_RPC_URL="YOUR_ALCHEMY_OR_INFURA_API_URL"
PRIVATE_KEY="YOUR_WALLET_PRIVATE_KEY"
You can get a free API URL from a node provider service like Alchemy or Infura. These services act as a bridge, allowing your local project to communicate with the live Sepolia network.
Finally, and this is crucial, open your .gitignore file and add .env to the list. This tells Git to completely ignore the file, ensuring it never gets accidentally uploaded to your repository.
Updating the Hardhat Configuration
Now it's time to teach Hardhat how to find and use these secrets. Open your hardhat.config.js file and modify it to load the variables from your new .env file and define the Sepolia network.
require("@nomicfoundation/hardhat-toolbox");
require("dotenv").config();
/** @type import('hardhat/config').HardhatUserConfig */
module.exports = {
solidity: "0.8.24",
networks: {
sepolia: {
url: process.env.SEPOLIA_RPC_URL,
accounts: [process.env.PRIVATE_KEY],
},
},
};
This simple addition tells Hardhat that whenever we ask it to use the "sepolia" network, it should connect using our RPC URL and sign transactions with the private key we provided.
Running the Deployment Script
With all the configuration in place, the actual deployment is surprisingly simple. Hardhat gives us a default deployment script in the /scripts folder. Just open deploy.js to make sure it's set up to deploy your SimpleStorage contract.
Ready? Let's do this. In your terminal, run the following command:
npx hardhat run scripts/deploy.js --network sepolia
You'll see Hardhat spring into action. It will compile your contract one last time, connect to the Sepolia testnet using your configuration, and broadcast the deployment transaction. If all goes well, your terminal will print the new contract's address on the Sepolia blockchain.
Congratulations! You can copy that address and paste it into a block explorer like Sepolia Etherscan to see your smart contract, live on a public network. You've officially bridged the gap from local development to the decentralized world.
What’s Next On Your Solidity Career Path?
Getting your first smart contract deployed is a huge win—congratulations! It's a critical first step, but it really is just the starting line. The entire Web3 space, from DeFi and GameFi to NFTs, is expanding like crazy, and that means the demand for developers who actually know what they're doing has gone through the roof.
This has created a really interesting and competitive market where developers who have honed their skills are in a great position. In the United States, the average salary for a Solidity developer hovers around $110,000, and it’s not uncommon to see senior roles pushing $225,000 or more. If you're curious about where things are headed, check out these 2025 Solidity hiring statistics for a deeper look.
Skills That Will Get You Hired
So, how do you go from writing "Hello, World!" on the blockchain to becoming an indispensable expert? It comes down to building skills that go far beyond just basic contract syntax. Employers aren't just looking for someone who can write a contract; they need someone who truly understands the entire ecosystem.
Here are the key areas I'd recommend digging into:
- Gas Optimization: This is a big one. Anyone can write code that works, but a great developer writes code that’s efficient. Learning how to minimize transaction costs is a skill that will immediately make you more valuable to any project.
- Smart Contract Security: You need to get comfortable with thinking like an attacker. Understanding common vulnerabilities like reentrancy attacks or integer overflows is non-negotiable for building code that people can trust with real money.
- Web3 Tooling: Your smart contract doesn't live in a vacuum. You'll need to master the tools that connect it to the real world, which means getting proficient with front-end libraries like Ethers.js or Web3.js to build functional dApps.
If you consistently work on these skills, you’ll be in a prime position to land one of the best blockchain jobs available today.
A Few Common Solidity Questions
As you get deeper into writing Solidity, you’re bound to run into a few common questions. It’s totally normal. Getting these cleared up early will help you build a solid foundation and keep your momentum going. Let's walk through some of the big ones I see all the time.
Testnet vs. Mainnet
So, what's the deal with testnets and the mainnet?
Think of a testnet like Sepolia as the ultimate playground for your code. It's a live, public blockchain that works just like the real Ethereum network, but the "Ether" on it is completely free and has no value. This is where you can deploy your contracts, smash them with tests, and hunt for bugs without spending a dime. It's your sandbox.
The mainnet is the real deal. It’s the live, public Ethereum blockchain where every transaction costs actual money and every action is permanent. Deploying to a testnet first is the non-negotiable final check to make sure your contract is secure and works exactly as intended before you push it out into the wild where the stakes are high.
Why Is Everyone So Obsessed with Gas?
You’ll hear Solidity developers talk about gas optimization constantly. Why?
Every single thing that happens on the Ethereum network—from adding two numbers to saving a piece of information—has a cost. That cost is paid in a fee called gas, which users pay in Ether (ETH). If your code is clunky or inefficient, it will chew through more gas, making transactions on your dApp more expensive for your users.
Gas optimization is really about being a considerate developer. It’s the craft of writing clean, efficient code that does the most with the fewest computational steps. This isn't just a technical exercise; it directly affects whether people can actually afford to use what you've built.
Can You Change a Contract After It's Deployed?
This is a huge one. What happens if you find a bug or want to add a new feature? By their very nature, smart contracts are immutable. Once a contract is live on the blockchain, its code can't be changed. That’s a core feature, not a bug—it’s what makes them so trustworthy.
But in the real world, things need to evolve. To handle this, developers use clever architectural solutions like the Proxy Pattern. This approach essentially separates the contract's "brain" (the logic) from its "memory" (the data storage). This allows you to swap out the logic for an upgraded version without ever touching the contract's address or losing all its precious data and history.
Ready to turn your new skills into a career? Find Web3 is the top destination for discovering your next role in the blockchain space. Browse thousands of open positions in engineering, security, and more at https://findweb3.com.